Ancient Greek and Roman Sculpture

Left: Statue of Athena Parthenos (the Virgin Goddess), Roman, Imperial Period, 2nd or 3rd century CE. Marble. Classical Department Exchange Fund.
Right: Athena Parthenos 3D model with restored polychromy, produced in partnership with Black Math. Image courtesy of Black Math.
Left: Statue of Athena Parthenos (the Virgin Goddess), Roman, Imperial Period, 2nd or 3rd century CE. Marble. Classical Department Exchange Fund.
Right: Athena Parthenos 3D model with restored polychromy, produced in partnership with Black Math. Image courtesy of Black Math.
Learn how to create a sculpture inspired by ancient Greek and Roman art in the Museum’s collections.
Artists have been creating sculptures for thousands of years. These three-dimensional works of art are made by using tools to model, cast, or shape materials such as clay, metal, stone, and wood. Sometimes sculptures are made into a relief—artwork that has a flat base and raised designs on one side, and is meant to be hung on a wall. Other times sculptures are in the round—artwork that stands up on its own and has designs and details all the way around it.
Ancient Greeks and Romans created sculptures as a way to remember important moments, tell stories, and honor gods, goddesses, and their heroes. These beautiful pieces of artwork decorated buildings and temples. Many different types were created, such as relief panels, monuments, three-dimensional life-sized figures, and portrait busts—the head, neck, and upper body of a person sculpted out of stone or cast in metal. Faces had more expression and figures were often sculpted to look like they were moving. Large sculptures (some over ten feet tall!) were created in pieces and then joined together using metal rods. The ancient Greeks created perfectly proportioned and idealized sculptures that showcased their idea of perfection, especially with the human form. The ancient Romans admired the sculptures created by the Greeks, but preferred to create their own versions that represented real people with their natural beauty and imperfections.
The all-white sculptures that we see today are quite different than they were more than 1,600 years ago. Take a close look at the marble statue of Athena Parthenos above. Athena is the goddess of war and wisdom. This sculpture is a smaller Roman-period replica of the original 38-foot-tall gold and ivory statue that once stood within the Parthenon on the Athenian Acropolis in Greece. Can you see the traces of paint on the lower curls on Athena’s left shoulder? After a sculptor carved this statue of the goddess, it was painted in many different colors! Artists often used brightly colored paint to add patterns and finishing touches to the skin, hair, eyebrows, and lips. Sometimes they even used bone, crystal, or glass for the eyes, or added bronze spears, swords, helmets, and jewelry!
Many sculptures that survive were made out of marble, and some were made out of bronze. Metal sculptures were sometimes melted down and used to make other things like weapons or coins because bronze was very valuable.
Think about the type of sculpture you want to create. What materials and techniques will you use to tell a story?
Instructions and photos courtesy of Thomaida Mele.
Materials
You will need:
- wooden doll pin and base
- white Crayola Model Magic or self-hardening clay
- sculpting tools, a toothpick, popsicle stick, fork, spoon, or butter knife
- cardboard base
- double-sided tape
- decorative embellishments such as googly eyes, feathers, pipe cleaners, plastic gemstones, or pieces of fabric
- optional: washable markers or paint (for self-hardening clay)
Sculpture Inspiration

Sarcophagus lid fragment: sea monsters, Roman, Late Roman Imperial Period, Late Roman, about 350 CE. Stone, marble. Gift of Charles C. Perkins.Relief
The designs on this stone fragment from ancient Rome are carved in low relief, which means they are not very high or bumpy. Look closely. Can you see the large, fishy tail of a sea beast swimming over the waves at the right? Or the pair of sea lions or leopards following it?

Upper part of a grave stele: seated sphinx (sphinx and capital), Greek, Archaic Period, about 530 CE. Marble. 1931 and 1939 Purchase Funds.In the Round
This sculpture from Ancient Greece has a sphinx on the top. A sphinx is a mythological creature that has the body of a lion, the head of a woman, and the wings and feathers of a bird. Use your imagination: even though it doesn’t look like it, this sculpture originally had a head with long, black hair! The feathers on the wings were carved and painted in a pattern of green, black, red, and blue, and the feathers on the chest were carved in a scale pattern in alternating rows of red and green. The creature’s legs were also painted green.
Instructions
Step 1

Let’s get ready! Put the wooden doll pin and base together. Keep the rounded end of the pin at the top and place the other end inside the base through the hole. The base will help hold the pin upright and help your sculpture stand up. Step 2

Unwrap the package of Crayola Model Magic or self-hardening clay. Smoosh, mold, and roll it around in your hand or on the table until it is easier to work with. Step 3

Wrap some of the clay around the doll pin so that it is stable. Push and mold the clay with your fingers until it becomes the shape you want. Look, I made a gorgon tail by squeezing and rolling a small piece! Squeeze the clay with your fingers or with a sculpting tool to create curves, textures, and shapes. Push the clay down to flatten it or squeeze and push to make it stick out more. You can use a whole piece of clay to shape the body or do what the ancient Greek and Roman sculptors did—shape each part separately and then put them together! Step 4
For a more colorful sculpture, you can draw on the white Crayola Model Magic. Before it dries, try adding color and mixing it in by molding and smooshing the clay until you like the way it looks. For a more intense color, keep drawing with markers and mixing it in. If you only want color in a few places or want to add details, you can also draw on the sculpture before or after it dries. Remember, it is OK to use Crayola Model Magic in the Museum, but markers are just for home. Step 5

To make facial features and different expressions, take small pieces of clay and use the sculpting tools and your fingers to add details like eyes, a nose, and a mouth. What kind of hair does Medusa have? Step 6

Keep adding pieces of clay to make hands, hair, and other decorations. I rolled small pieces and used a sculpting tool to create snakes for Medusa’s hair, arms, and the lines on the tail. Step 7
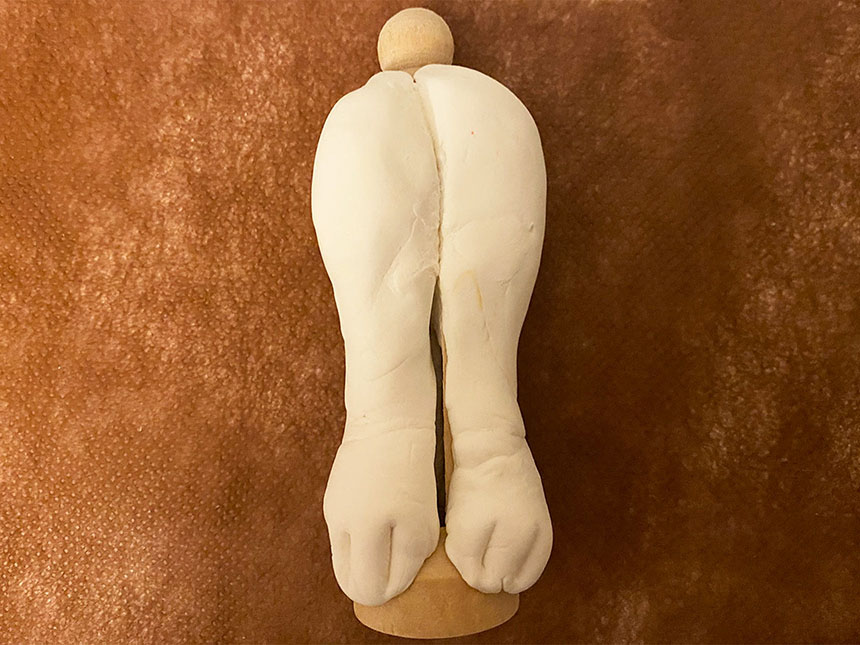
Try creating legs for animals and mythical creatures by using two different pieces of clay and sticking them together or by wrapping one piece around the doll pin and using the sculpture tool to divide it and add details. Step 8

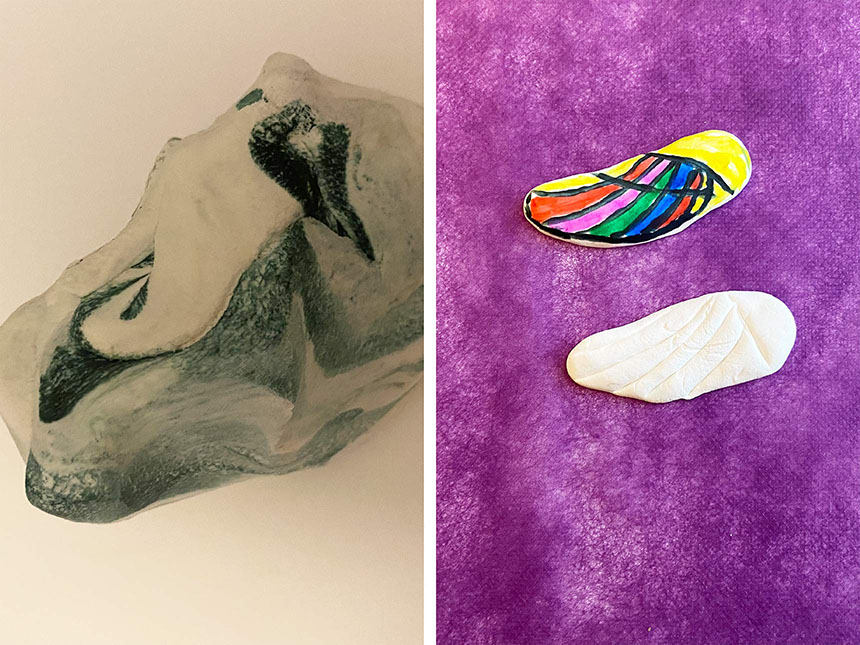
Use clay or other items—like feathers—for wings, or pipe cleaners and wire for the tail or hair. Remember, if you are recreating artwork from the classical period, sculptors loved to make their artwork look realistic. Scratches can seem like wrinkles or muscles. Don’t forget to make it look like your sculpture is moving! Step 9

Try adding some decorations when you are done making all the body parts and are happy with the color and shape. Fabric and jewels might help add the final touch to a special outfit and make your sculpture truly unique. Step 10

Remove the paper backing on the double-sided tape and stick your sculpture onto the base for display. Congratulations on your new creation! About the Artist

Thomaida Mele is a philologist living in Boston. Originally from Greece, she received her master’s degree in Classical Studies from University of Crete. Thomaida loves art and museums. Her professional experience includes more than ten years teaching Ancient Greek, Latin, history, and philosophy to high school students. She was also a Museum Educator in the Artful Adventures program at the Museum of Fine Arts, Boston. Thomaida strongly believes that all art has one common characteristic—it unites people!