Embossed Coin Designs

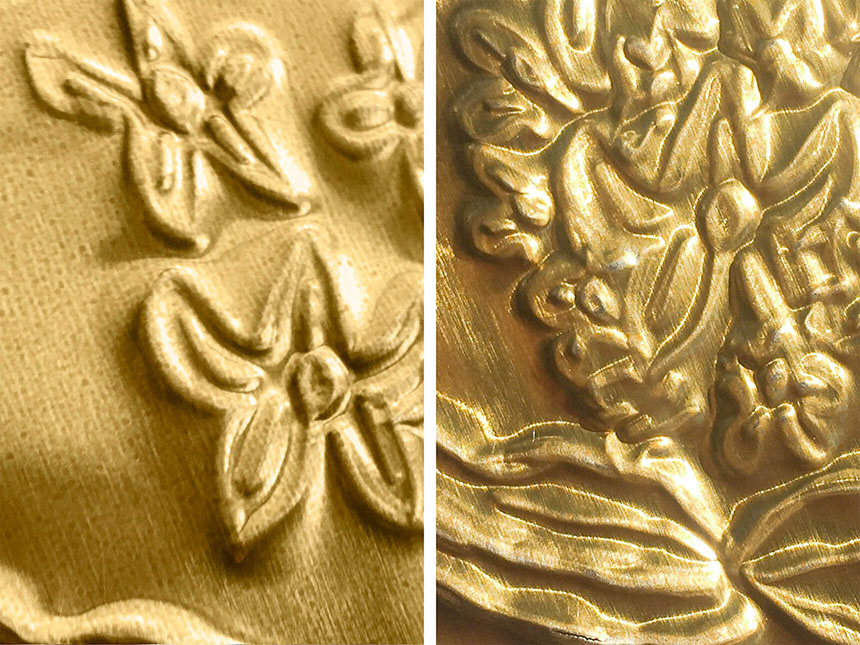
Unknown artist, coin, Near Eastern, Iranian, Persian, 293–303 CE. Gold. Anonymous gift in memory of Zoë Wilbour (1864–1885).
Unknown artist, coin, Near Eastern, Iranian, Persian, 293–303 CE. Gold. Anonymous gift in memory of Zoë Wilbour (1864–1885).
Nowruz, which means “new day” in Persian, is an ancient celebration signaling the beginning of spring. Family members gather around a traditional Haft Seen arrangement that usually contains mirrors, candles, colorful painted eggs, flowers, fruits, nuts, sweets, a goldfish swimming in a bowl of water, and seven symbolic items that start with the Persian letter sīn, or s. The items placed on a Haft Seen vary from family to family, but often include apples (seeb) for beauty; garlic (seer) for good health; vinegar (serkeh) for patience; hyacinth (sonbol) for spring; sweet pudding (samanu) for fertility; sprouts (sabzeh) for rebirth; and coins (sekkeh) for prosperity.
Festivities begin when the sun crosses the equator at the vernal equinox and last for twelve days. During this time, many families prepare special meals, clean their houses, purchase new clothes, and visit with friends and family. On the thirteenth day, families have a picnic and throw the sprouts (sabzeh) from the Haft Seen into flowing water to symbolize the return to nature and the start of spring.
If you have an MFA art kit for this activity, you already have all the materials you need to create your own embossed metal coin designs for wealth and prosperity in the new year! If not, start by gathering the materials. Below are some symbols and phrases related to Nowruz. Try putting them on your coin, or create a design from your own imagination. What messages or images of spring will you use?
| Persian | English Transliteration | English Translation |
|---|---|---|
| نوروز | Nowruz | new day |
| نوروز پیروز | Nowruz Pirooz | Nowruz victorious |
| سال نو مبارک | Sal-e Now Mubarak | Happy new year |
| س | sīn | s |
| سنبل | Sonbol | hyacinth |
Instructions

Materials
You will need:
- 38 gauge two-tone tooling foil or aluminum foil
- cardstock or plain paper coasters
- wooden stylus, pencil, or another tool with rounded and pointed ends
- cardboard
- glue stick
- scissors
- ribbon (optional)
Step 1

Let’s get ready! If you have an MFA art kit, place the materials on a table. If you don’t have an MFA art kit, use scissors to cut your tooling foil (or two to three layers of aluminum foil stacked on top of one another) into seven circles approximately two inches in diameter. Then cut seven circles the same size as the foil out of cardstock or plain paper coasters. Be careful of sharp corners and edges!
Step 2

Place one foil circle, gold side down, on top of the cardboard. If you’re using aluminum foil, make sure both sides are smooth when you layer the pieces before placing them on the cardboard.
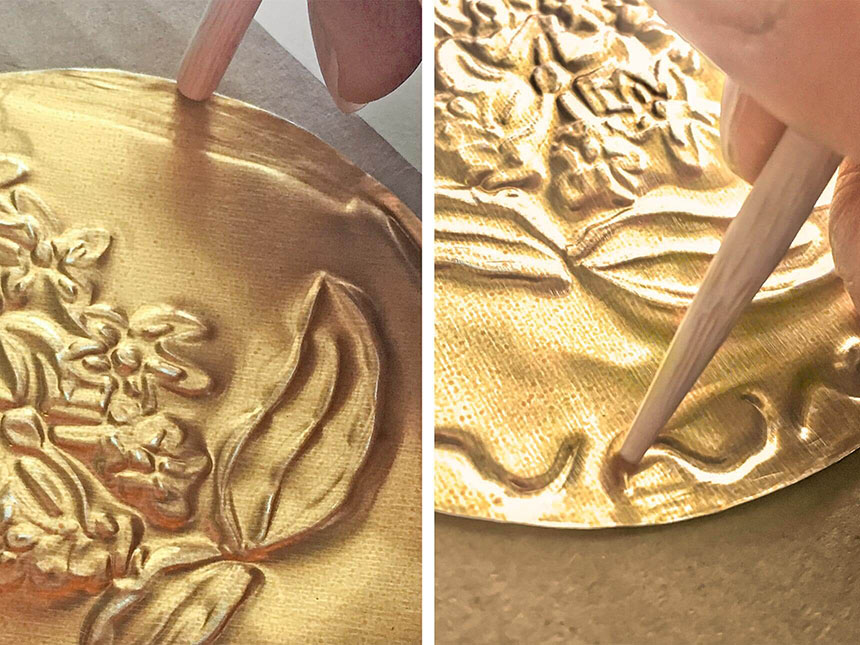
Step 3

Use a wooden stylus, clay tool, or dull pencil to draw designs or pictures onto the foil. Your image will come out backward, so words need to be spelled from right to left and letters need to be mirrored. You can also flip the foil over and write words as they actually appear by pressing into the front of the foil coin like in the finished example above.
Step 4
Periodically flip the foil over to see what your coin looks like on the other side. Creating designs by pushing into the metal will make the design bumpy on the other side. If it’s not bumpy enough, you can trace over it again, but be careful to not poke a hole in the metal.
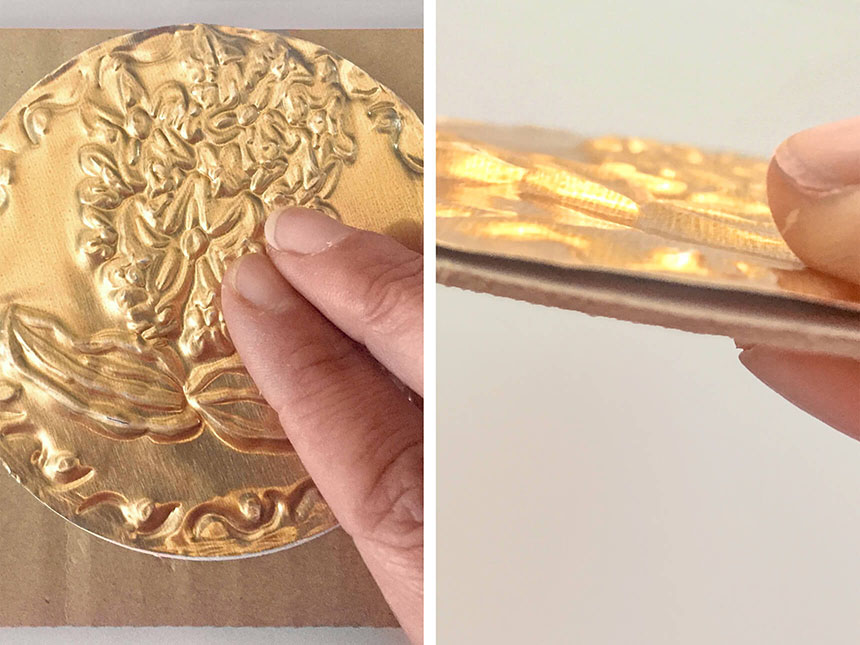
Step 5
You can “erase” marks and flatten edges by gently rubbing the foil with the rounded end of your tool. If you’d like, you can also add designs and details onto the front side of the foil, pressing down so that the design is indented, like in the border above.
Step 6

Once you’ve finished your design, use the glue stick to add glue to one side of the circle cardstock or coaster and place the foil coin on top. Or, if you’d like to create multiple coins on a hanging coin banner, go to Step 8.
Step 7
Carefully press the foil coin onto the cardstock, making sure that all edges are stuck.
Step 8 (Optional)
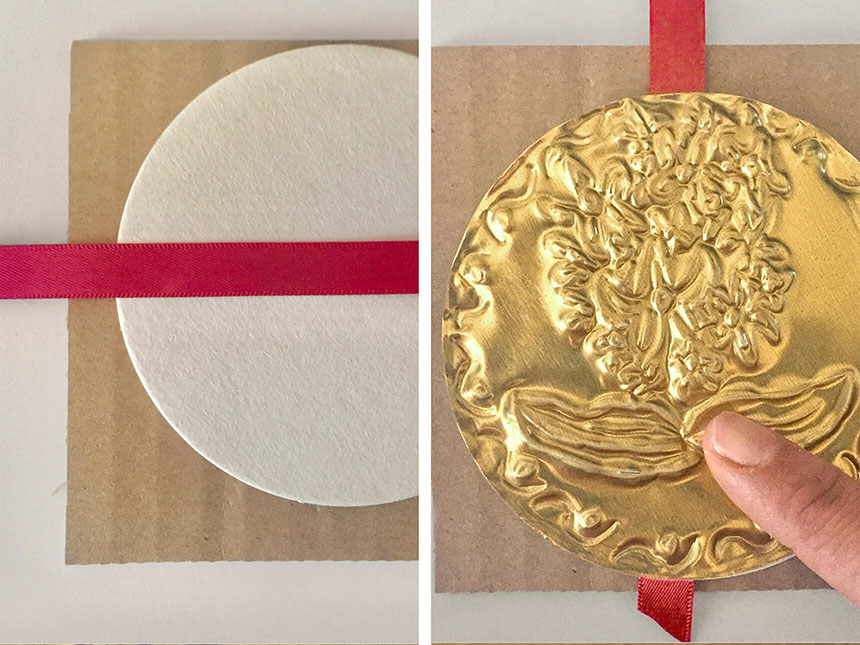
Bonus: If you’d like to create a hanging coin banner, glue a ribbon onto the cardstock, then glue the coin onto the cardstock, over the ribbon. Position the coin horizontally or vertically, depending on the direction you’d like to hang your banner. Add more coins as you create them!