Embossed Pendants

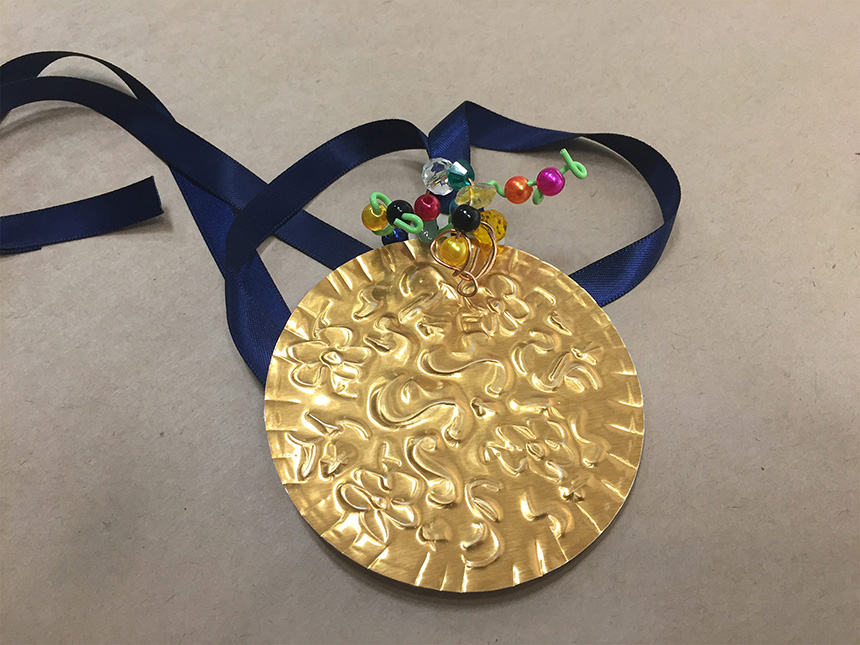
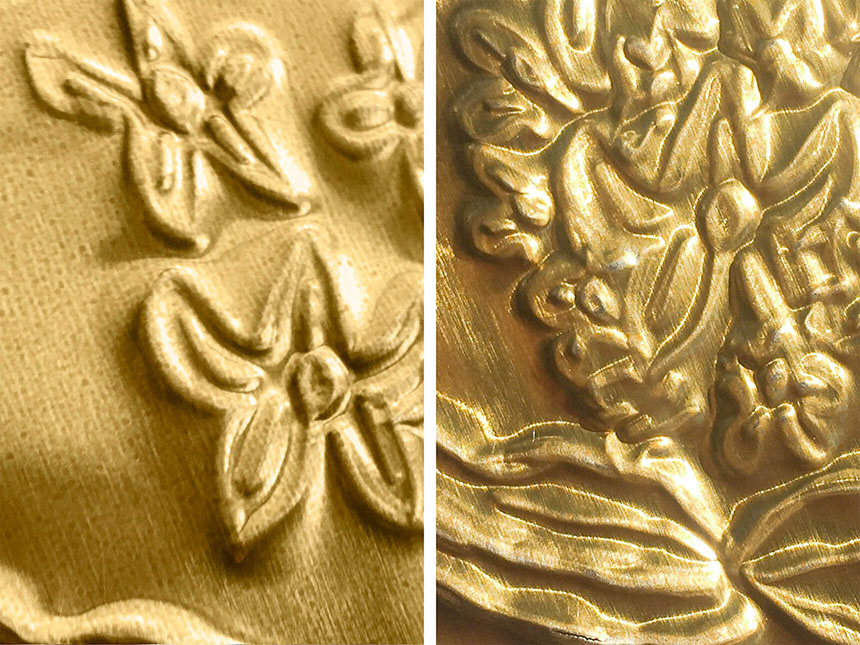
Embossed disk pectoral, Coclé Province, Panama, 700–1520. Gold alloy. Gift of Landon T. Clay.
Embossed disk pectoral, Coclé Province, Panama, 700–1520. Gold alloy. Gift of Landon T. Clay.
Many Indigenous civilizations in the Americas used a metalworking technique called repoussé or repoussage, in which metal is shaped by hammering or pressing from the back side to create a design that pops out on the front. These civilizations often used repoussé to create beautifully designed pectorals and pendants out of gold. Artists often depicted animals and plants in their surroundings to represent the power of the sun and nature. What design will you make?
Instructions
Materials
You will need:
- 38-gauge two-tone tooling foil or aluminum foil
- cardboard
- wooden stylus, pencil, or another tool with rounded and pointed ends
- glue stick
- wooden pendant or cardstock
- ribbon (optional)
- beads (optional)
- colorful wire (optional)
- hole punch (optional)
Step 1

Let’s get ready! If you have an MFA art kit, place the materials on a table. If you don’t have an MFA art kit, use scissors to cut your tooling foil (or two to three layers of aluminum foil stacked on top of one another) into a circle approximately two inches in diameter. Then cut a circle the same size as the foil out of cardstock. Be careful of sharp corners and edges!
Step 2

If you’re using tooling foil, decide if you would like to use the gold or the silver side and place the side you want shown face down on a piece of cardboard. If you’re using aluminum foil, make sure both sides are smooth when you layer the pieces, and then place them on cardboard.
Step 3

Use a wooden stylus, clay tool, or dull pencil to draw designs or pictures onto the foil. Your image will come out backward, so words need to be spelled from right to left and letters need to be mirrored. You can also flip the foil over and write words as they actually appear by pressing into the front.
Step 4
Periodically flip the foil over to see what your design looks like on the other side. Creating designs by pushing into the metal will make the design bumpy on the other side. If it’s not bumpy enough, you can trace over it again, but be careful to not poke a hole in the metal.
Step 5

If you have an MFA art kit, loop a piece of ribbon or string through the hole in the wooden pendant. Tie the ends together to finish it up. Twist, loop, and twirl wire through the holes at the top or around the ribbon. Add beads and other colorful details. You can also add these later.
If you are using materials from home, skip ahead to Step 6 and add ribbon, beads, and wire after gluing your pieces together.
Step 6

Once you’ve finished the design on the foil, use the glue stick to add glue to one side of the wooden pendant or cardstock and place the foil on top.
If you are using materials from home, punch a hole through the foil and cardboard then add ribbon, wire, and beads.
Step 7
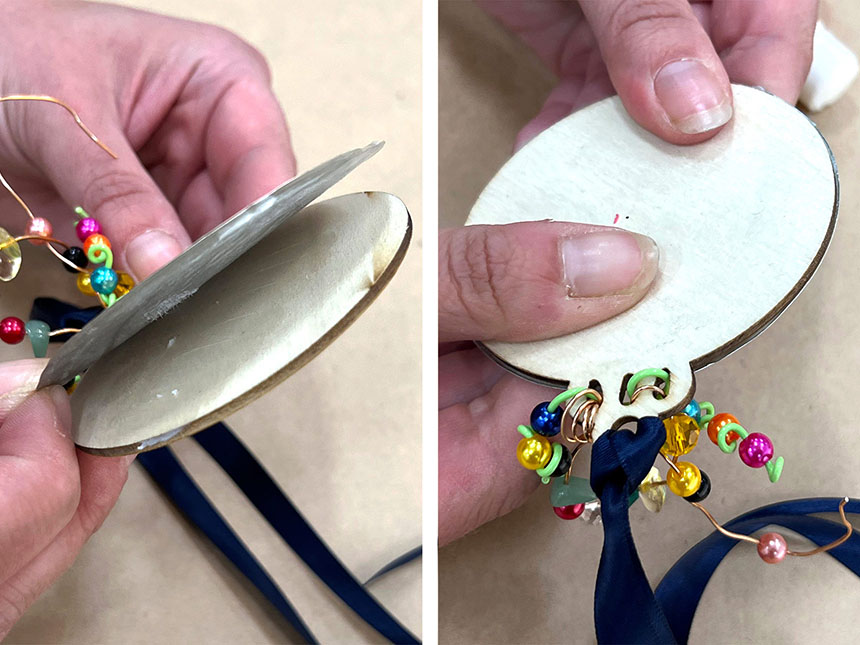
Carefully press the foil onto the wooden pendant or cardstock, making sure that all edges are stuck.
Step 8
Wear your pendant as a necklace or hang it up in your home. Enjoy!