Handmade Paper

Kenneth Noland, Untitled, 1978. Unique work made from paper pulp. Bequest of Virginia H. Deknatel in memory of Frederick B. Deknatel. © Kenneth Noland / Artists Rights Society (ARS), New York.
Kenneth Noland, Untitled, 1978. Unique work made from paper pulp. Bequest of Virginia H. Deknatel in memory of Frederick B. Deknatel. © Kenneth Noland / Artists Rights Society (ARS), New York.
For two thousand years, the craft of papermaking has been practiced all over the world. New sheets of paper can be made from the fibers of plants, trees, textiles, and even recycled paper. Depending on the type of material, either a chemical or mechanical process is needed to crush, cook, wash, screen, clean, and dry it so that it can be broken down and transformed into pulp. Take a look at the image above. Artist Kenneth Noland created this unique work of art using only paper pulp that he colored and pressed together. Some historical sources of pulp are scraps of linen and cotton textiles. Paper that consists primarily of cotton textiles is called cotton rag or rag paper. This type of paper lasts longer than others and is quite durable, so it’s often used for important documents and creating artwork. Over the years many artists have created artwork on handmade paper produced at the Richard de Bas paper mill located in a small town in France. This historic paper mill was founded in 1326 and is one of the few places in Europe that still makes paper by hand from fabrics today!
The MFA is one of the lead partners of Action Pact Boston, a citywide effort to spotlight environmental sustainability and climate concerns. On Memorial Day, visitors transformed recycled paper collected by staff from across the Museum into new, handmade sheets embedded with native, pollinator-friendly, and pesticide-free wildflower and meadow seeds. Join us in celebrating creative reuse, found materials, and biodiversity by learning how to make your own handcrafted paper using recycled materials at home!
About the Materials

Mould and Deckle
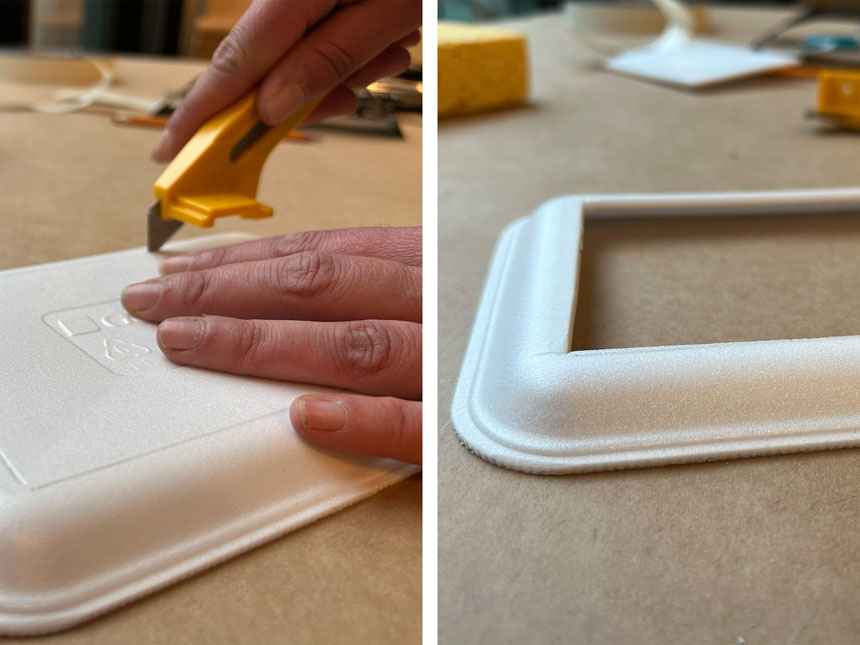
A mould and deckle are often used in Western-style papermaking. The mould with screening on top forms the base, and the deckle, a loose frame, is placed on top of the mould to help shape each sheet of paper and create straight edges. However, you can also make paper with just one frame or a clean styrofoam tray with a window screen attached! The edges of your paper won’t be as straight without a deckle, but you can always trim them with scissors once your sheet is dry.
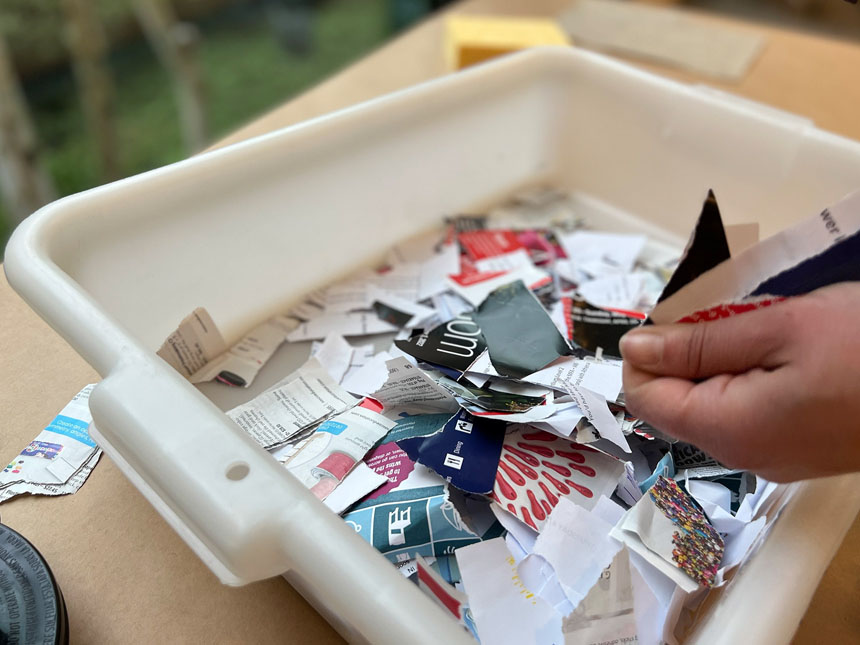
Selecting Your Recycled Paper
Drawing, printmaking, and watercolor papers work best because they have strong fibers, but you can use any type of recycled paper that you have! Try using printer paper, old notes, construction paper, magazines, shredded paper, and even junk mail. The type of paper and the colors in each one will change how your new, handmade paper looks and feels once it’s dry. The most important thing is to make sure that the paper you select has never been used with food, and there are no staples, pieces of plastic, or bound edges.
Adding Materials to Your Paper
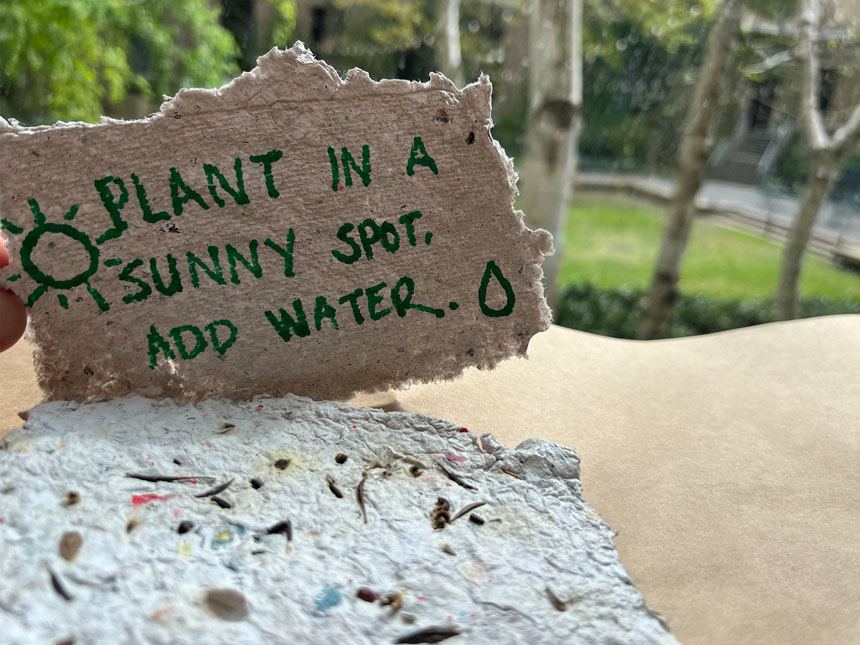
If you’d like, use dry fingers to sprinkle seeds over the wet pulp before it is removed from the mould (see step 8). You can also create patterns and designs by pressing dried flowers, leaves, grasses, and small pieces of string into the surface after it is removed from the mould. If you’ve used seeds, once your paper is dry, plant it in a sunny location under a little bit of soil. Keep seedlings watered until they are 6 inches tall, and then whenever the soil feels dry. At the MFA, we used a mix of native wildflower and meadow seeds that will bloom from summer to fall, year after year, in most Northeast regions.
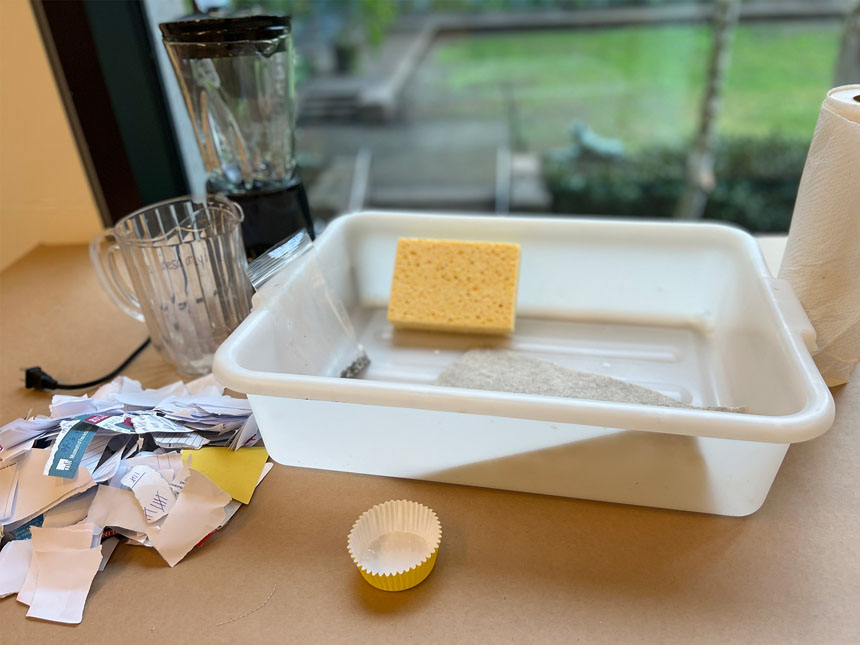
Materials
You will need:
- clean styrofoam tray
- a pencil
- a utility knife or box cutter
- aluminum (not fiberglass) window screen
- scissors
- duct or waterproof tape
- absorbent sponge
- a few handfuls of recycled paper ripped into 1-inch pieces
- a plastic container, tub, or large dishpan
- blender
- a few sheets of felt or towels
- plastic tray or wooden board
- pressed flowers and leaves, pieces of string, or yarn for decoration (optional)
- native wildflower seeds (choose seeds that are non-GMO and neonicotinoid-free to attract birds and protect pollinating insects) (optional)
Instructions
Step 1
Step 2

Step 3

Step 4

Step 5

Step 6

Step 7

Step 8

Step 9

Step 10

Step 11

Step 12

The MFA is committed to reducing our greenhouse gas emissions, increasing resiliency, and providing a forum for creativity and community to promote sustainability.