Portraits of Leadership

Kehinde Wiley, John, 1st Baron Byron, 2013. Oil on canvas. Juliana Cheney Edwards Collection, The Heritage Fund for a Diverse Collection and funds donated by Stephen Borkowski in honor of Jason Collins.
Kehinde Wiley, John, 1st Baron Byron, 2013. Oil on canvas. Juliana Cheney Edwards Collection, The Heritage Fund for a Diverse Collection and funds donated by Stephen Borkowski in honor of Jason Collins.
Learn how to draw a portrait using materials from home.
A portrait is an artwork that portrays, or shows, a person. It can be a painting, drawing, sculpture, photograph, or even a mixed-media collage. Sometimes artists just show the head and shoulders of a person. Other artists choose to show the person’s full body, from head to toe. Sometimes artists add landscapes, or buildings in the background, or show the person in certain clothing, or holding certain objects as clues for the viewer to learn more about the person in the portrait.
Take a closer look at the portrait above of John, 1st Baron Byron created by artist Kehinde Wiley. What do you think the artist wants you, the viewer, to know about the person in the painting based on the clothes they are wearing, the way they are standing, and the flowers in the background and foreground?
In 2018, artists Kehinde Wiley and Amy Sherald unveiled their portraits of Barack and Michelle Obama. Unlike any other earlier images of presidents and first ladies, the paintings broke barriers and paved the way for new artistic vision. The artists created pictures that were both extraordinary and approachable—making space for people of color and allowing audiences to see themselves in President Obama and the former First Lady.
Leadership takes many forms and means something different to each of us. It can be seen in family members, friends, teachers, coaches—even in presidents and first ladies! As an artist, you can choose to create a portrait that looks exactly like the person you are showcasing in your artwork, or you can use your imagination to create a colorful contemporary piece that captures a person’s personality or spirit instead of their likeness.
What does a leader look like to you?
Photos and instructions courtesy of Anna Fubini.
Materials
You will need:
- Portrait Drawing Guide (PDF)
- Mixed media, watercolor, or thick craft paper cut to 5 in x 7 in
- Liquid glue or a glue stick
- Scissors
- Drawing pencils, fine-tipped pens, markers, crayons, or colored pencils
- Eraser
- Colorful paper, patterned paper, or pages from an old newspaper or magazine
- Paint
- Paintbrush
Instructions
Step 1

Gather the materials you would like to use and start thinking about the person you will be showing in your portrait.
Step 2

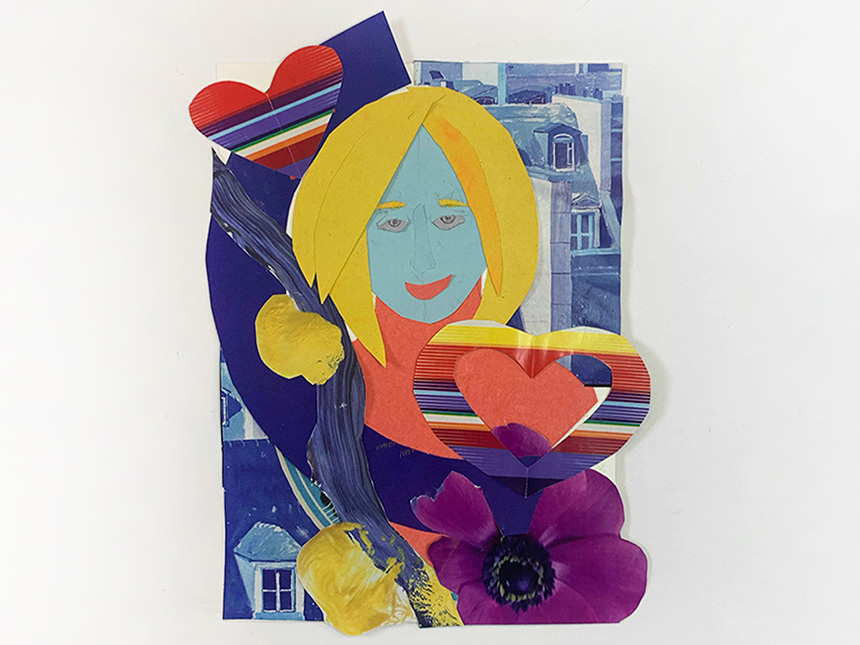
Think about the pose you will have your leader make and where you want to place them on the paper. You can choose to make a portrait of the person’s whole body or just their face. Use a pencil to create a sketch or outline on your paper. This will help you decide where to put collage pieces or to figure out the shape of the person if you are making a painting or drawing. In this example, we are going to make a collage using colorful paper.
Step 3

If you are also going to make a collage, first draw the shape of the head and body parts on color paper. Use scissors to cut shapes out of color paper for the head and body. When you are done, use glue to stick your shapes to the paper where you drew your outline.
Step 4

Continue cutting out shapes. What other details can you add? Think about the person in your portrait. What does their hair look like? What type of clothes do they like to wear? Do they have a favorite flower, food, or hobby? If you want to include a background you can also start cutting out shapes for that, too.
Step 5

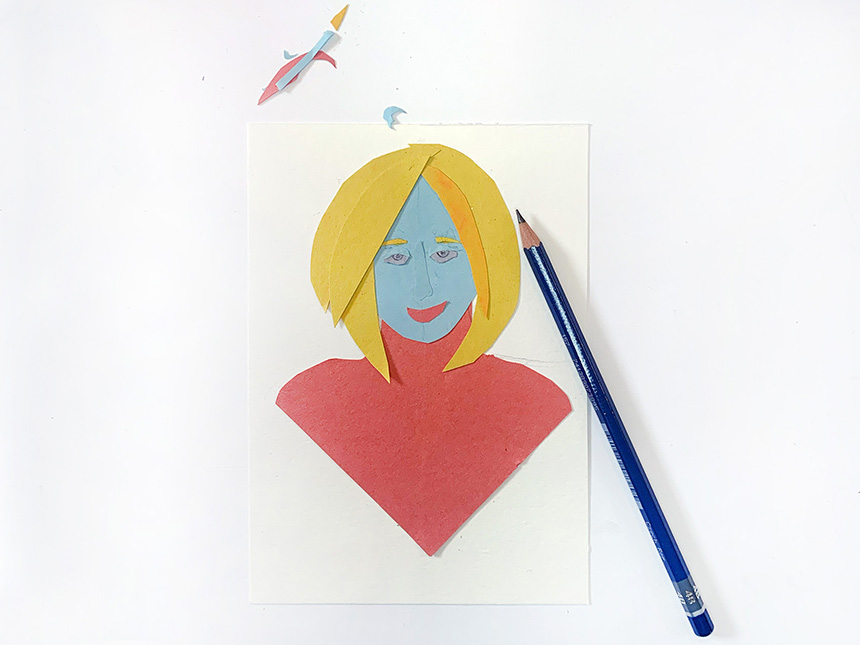
Take a look at the Portrait Drawing Guide (PDF). It will help you measure the proportions of the person’s face. Use your pencil and lightly draw where you will place facial features such as the eyes, nose, mouth, and eyebrows. Don’t worry if it’s not perfect! You can use another drawing tool to add details or cut shapes out of colorful paper. (See tips below.)
Step 6
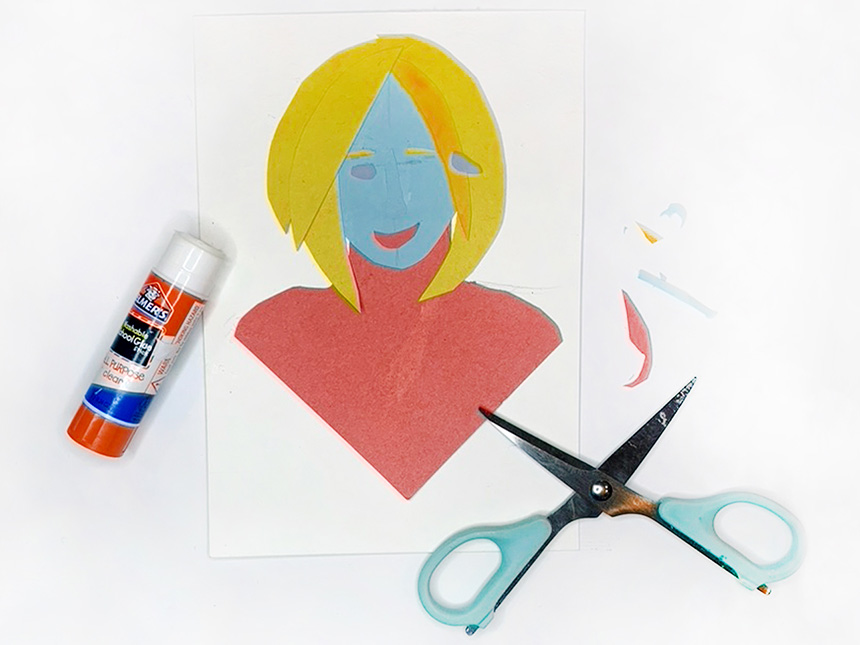
Start adding details to the person’s face. Move pieces around before gluing them to the paper. What expression do you want the person to be making? Should they be smiling, frowning, or making a funny face? Changing the placement of the eyebrows and the shape of the mouth changes the look of the portrait and conveys a different mood.
Step 7

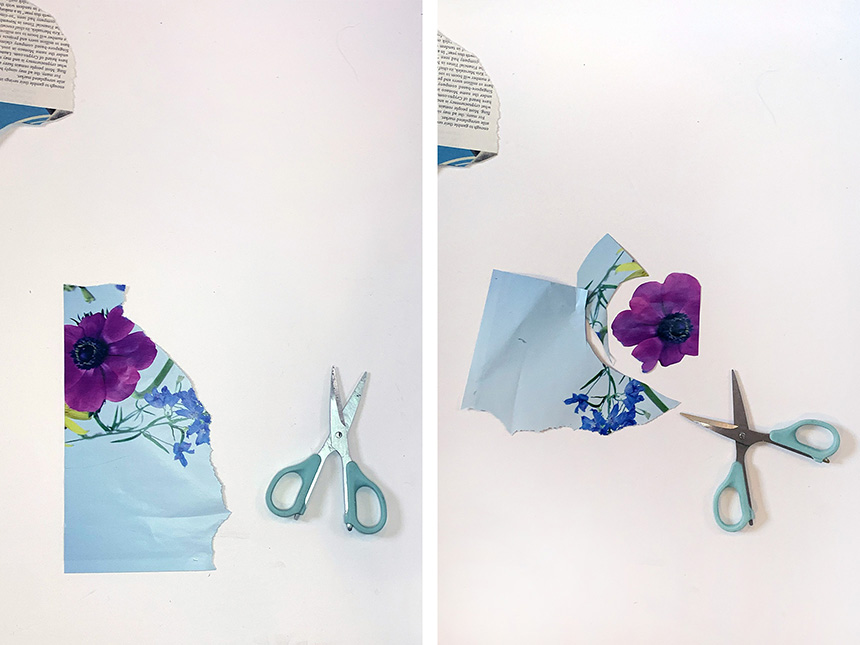
What other elements would you like to add to show the person’s personality, their achievements, and what they mean to you? Look through old magazines and newspapers to find images, cut shapes out of colorful paper, or use drawing and painting materials to add details and clues. (See tips below.) Move pieces around before gluing them to the paper.
Step 8
Experiment until you like how your portrait looks.
Art-Making Tips
Adding Details
Use a regular pencil, colored pencil, or fine-tipped marker to add details for the face, eyes, and hair.
Cutting Out Images
Cutting small images out of a large piece of paper can be tricky. Start by tearing the page out of an old magazine or newspaper. Take your time and use scissors to cut around it first – don’t worry about all of the little details yet. When the small image is no longer attached to the page, carefully cut around it to remove any leftover background.
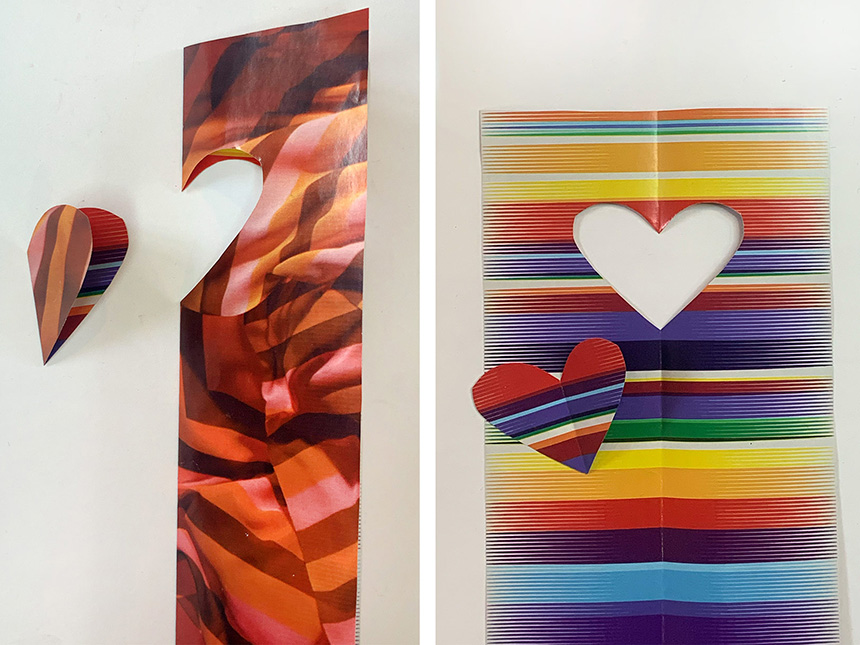
Making Symmetrical Shapes
To cut a symmetrical shape—a shape that looks the same on the left and right side—fold your paper in half and trace a shape along the fold line. Cut out the shape and unfold. Both sides will be the same. This technique is great for cutting out hearts, circles, and abstract shapes. Experiment with using both positive and negative space in your piece. Don't be afraid to layer pieces on the top of one another.
About the Artist
Anna Fubini is a community arts educator and contemporary visual artist born and raised in Brookline. She received a BS in studio art and gender studies from Skidmore College and is in Boston University’s Masters of Arts Administration graduate program. As an artist she works in experimental fibers and mixed media to create large-scale sculpture and installations. She has worked with students of all ages and backgrounds at the New Art Center, Beaver Country Day School, and Rosie’s Place Women’s Shelter. At the MFA Anna is the Community Arts Liaison with the West End House Boys & Girls Club of Allston-Brighton.